Author: ddbuilderb39a54

  • How to Read an Electrical Panel Label Before Resetting a Breaker

    How to Read an Electrical Panel Label Before Resetting a Breaker

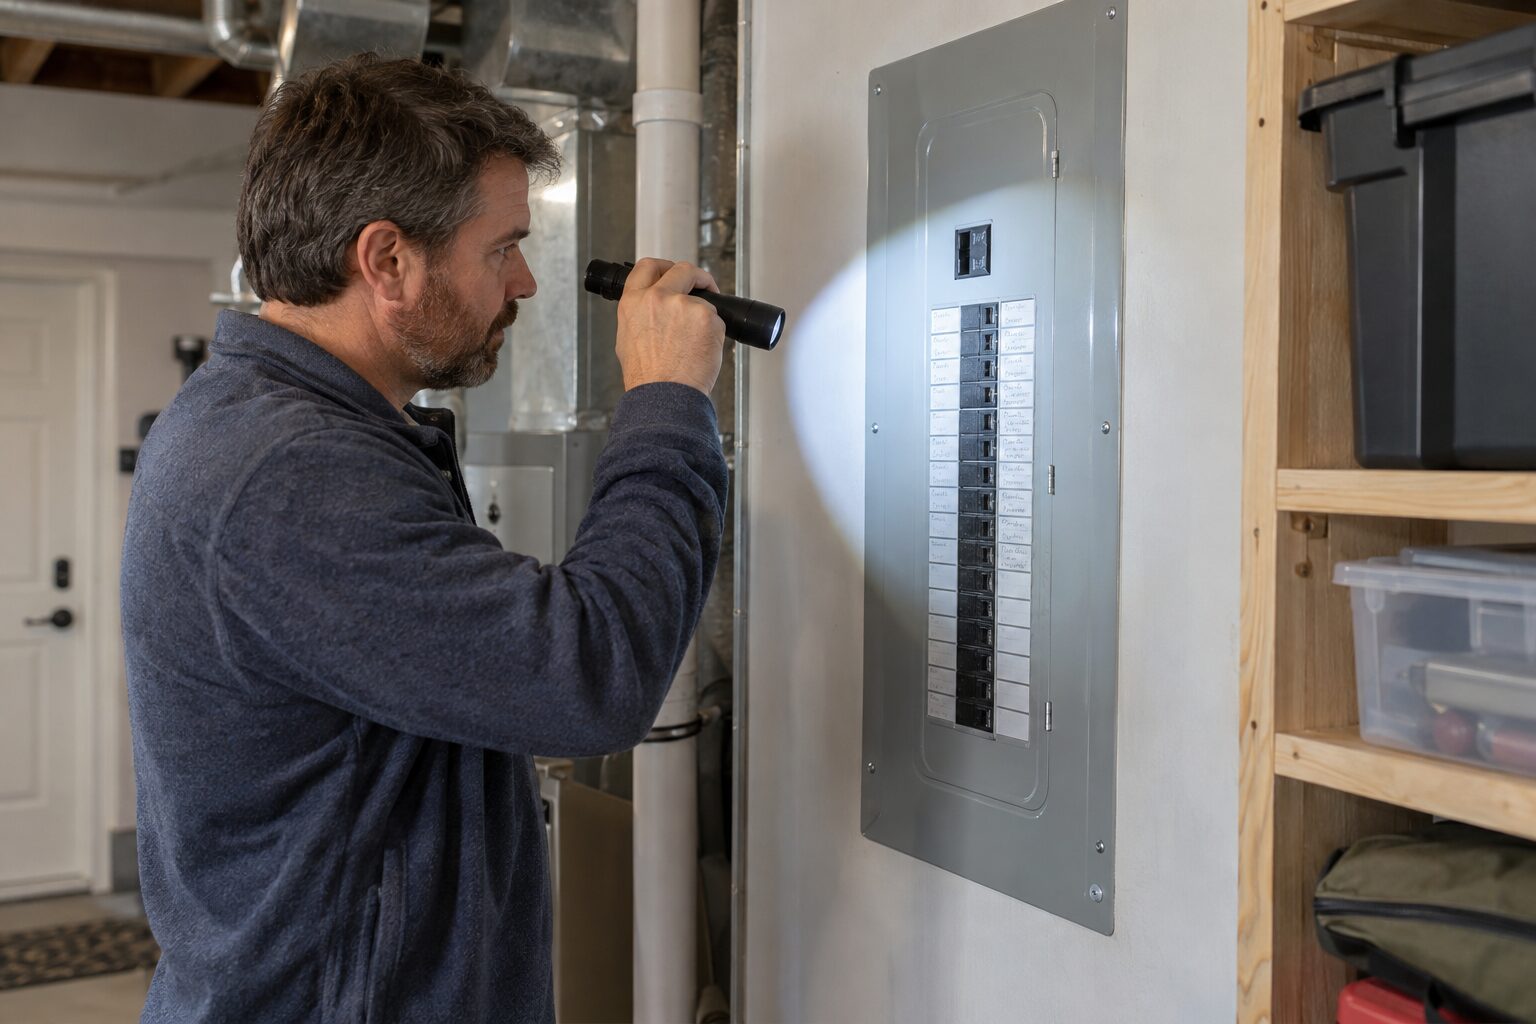
    A breaker panel is easier to use safely when its labels describe what each circuit actually serves. Labels can be incomplete after renovations, handwritten in a hurry, or copied from an old panel schedule. Before resetting a breaker or planning a repair, take time to read the panel without removing its cover and compare the labels with the rooms and equipment that lose power.

    Start with the panel closed

    A homeowner can read the visible schedule and observe breaker positions without removing the dead-front cover. Keep the cover closed, stand on a dry floor, and use a flashlight if the utility space is dim. Do not touch exposed conductors, remove screws, or work inside a panel unless you are qualified and local rules permit it.

    Stop if the panel is wet, hot, damaged, buzzing, smoking, or giving off a burning smell. Those signs need professional attention rather than a labeling project.

    Read the schedule as a map

    Write down the label beside each breaker in order, including descriptions such as kitchen receptacles, furnace, laundry, exterior outlets, or bedroom lights. A label may refer to a circuit number, a room, or a specific appliance. Do not assume that a room label means every outlet in that room is on the same circuit.

    Note spaces that are blank, crossed out, or marked with question marks. These are useful clues, not evidence that a circuit is unused.

    Test one circuit at a time

    Use a small lamp or plug-in tester only at accessible receptacles and only when the outlet and cord are in good condition. With another adult watching if possible, switch off one identified breaker and observe exactly what loses power. Never use a tester as proof that a circuit is safe to open; it only indicates what the device can detect at that point.

    Check nearby lights, receptacles, fixed equipment, and exterior outlets. Some devices have delayed starts or separate controls, so allow enough time for the observation. Record surprises such as a refrigerator that shares a general circuit or a hallway light controlled from another area.

    Watch for shared and multi-wire arrangements

    Two breakers may be connected by a handle tie or operate as a paired set for a 240-volt appliance. Do not separate, rearrange, or relabel paired breakers based only on appearance. A circuit can also feed more than one room, and an outlet may be downstream of a GFCI device located elsewhere.

    If a breaker trips repeatedly, feels loose, or will not stay in position, leave the suspected load disconnected and arrange professional diagnosis.

    Rewrite labels clearly

    Once observations are complete, update the schedule in durable, legible language. Use a description that tells the next person what the circuit serves, such as Kitchen counter outletseast wall instead of simply kitchen. Keep the original schedule or photograph it before making changes so the history is not lost.

    Do not label a breaker off permanently as a substitute for repairing a fault. Do not cover manufacturer information, warning labels, or the panel rating.

    When to call an electrician

    Get professional help for heat, scorch marks, water entry, unexplained trips, flickering, shocks, missing covers, overloaded circuits, aluminum-wiring concerns, or any work inside the panel. A clear schedule is useful, but it cannot correct an unsafe connection or prove that a circuit was installed correctly.

    A careful panel map makes future troubleshooting faster while preserving the most important rule: observe from the safe user-accessible side, document what you find, and stop when the condition goes beyond ordinary labeling.
    Related guides

  • Remove Wall Scuff Marks Safely

    Remove Wall Scuff Marks Safely

    Dark marks from shoes and furniture often sit on the paint film rather than in the wall. Start with the least aggressive method to preserve the finish.

    Step-by-step

    Dust the area, then try a damp microfiber cloth with a drop of dish soap. Wipe lightly and dry immediately. For stubborn marks, test a melamine sponge in an unseen corner and use only a few gentle passes; it can dull flat paint. Touch up with the original paint rather than repeatedly scrubbing.

    Keep it safe

    Do not use solvents on painted drywall without testing. If the mark is accompanied by bubbling, softness, or a spreading stain, investigate moisture instead of treating it as ordinary dirt.

    Quick check: Add this task to a seasonal home log, take a before-and-after photo, and stop if the condition is outside a simple maintenance fix.

    Why this small job matters

    Remove Wall Scuff Marks Safely is the kind of task that is easy to postpone because the first symptom rarely feels urgent. In a lived-in Room-by-Room routine, small changes add up: a little dust, a little moisture, or a little wear can make equipment work harder and can turn a ten-minute check into a weekend repair. The useful approach is to notice the change, write down what you see, and make one controlled adjustment at a time. That habit gives you a baseline for the next season and makes it easier to explain the situation if a specialist is needed.

    What to look for as you work

    Take a slow look before touching anything. Check for loose fasteners, unusual sounds, water marks, heat, damaged seals, or material that has changed color. Work in good light and keep the original parts, labels, and measurements nearby. If the result is not clearly better after the first safe step, stop and reassess rather than adding more force or more product. A short note about weather, age, and recent changes often reveals a pattern that is invisible in a single visit.

    A practical follow-up routine

    Finish by cleaning the work area and testing the result under normal conditions. Put the next inspection on a calendar, especially when the task depends on a season or a filter, seal, or moving part. Keep a simple home log with the date, what you changed, and a photo of the finished condition. That record turns maintenance into a calm routine instead of a reaction. When you find exposed wiring, structural damage, gas smells, persistent leaks, or anything that could injure someone, leave it alone and contact a qualified professional.

  • Clean Bathroom Grout Without Bleach

    Clean Bathroom Grout Without Bleach

    Grout darkens when soap film and moisture stay trapped in its texture. A mild, repeatable cleaning routine protects the joints and keeps the room brighter.

    Step-by-step

    Vacuum or wipe loose dust, then work in small sections with warm water and a pH-neutral tile cleaner. Agitate with a soft nylon brush, rinse with a clean cloth, and dry the surface completely. Treat mildew only with a product labeled for the tile and grout in your room, and never mix cleaners.

    Keep it safe

    Repair cracked grout and improve ventilation before sealing. A penetrating sealer can slow staining, but it will not fix leaks or replace regular drying after showers.

    Quick check: Add this task to a seasonal home log, take a before-and-after photo, and stop if the condition is outside a simple maintenance fix.

    Why this small job matters

    Clean Bathroom Grout Without Bleach is the kind of task that is easy to postpone because the first symptom rarely feels urgent. In a lived-in Cleaning routine, small changes add up: a little dust, a little moisture, or a little wear can make equipment work harder and can turn a ten-minute check into a weekend repair. The useful approach is to notice the change, write down what you see, and make one controlled adjustment at a time. That habit gives you a baseline for the next season and makes it easier to explain the situation if a specialist is needed.

    What to look for as you work

    Take a slow look before touching anything. Check for loose fasteners, unusual sounds, water marks, heat, damaged seals, or material that has changed color. Work in good light and keep the original parts, labels, and measurements nearby. If the result is not clearly better after the first safe step, stop and reassess rather than adding more force or more product. A short note about weather, age, and recent changes often reveals a pattern that is invisible in a single visit.

    A practical follow-up routine

    Finish by cleaning the work area and testing the result under normal conditions. Put the next inspection on a calendar, especially when the task depends on a season or a filter, seal, or moving part. Keep a simple home log with the date, what you changed, and a photo of the finished condition. That record turns maintenance into a calm routine instead of a reaction. When you find exposed wiring, structural damage, gas smells, persistent leaks, or anything that could injure someone, leave it alone and contact a qualified professional.

  • Clean a Glass Stovetop Without Scratches

    Clean a Glass Stovetop Without Scratches

    Glass cooktops stay clear when spills are softened before they are scrubbed. The safest routine uses a cool surface, a non-abrasive pad, and patience.

    Step-by-step

    Switch off burners and let the surface cool. Wipe loose crumbs, lay a damp cloth over cooked-on spots for ten minutes, then use a manufacturer-approved scraper at a shallow angle. Apply a small amount of cooktop cleaner and buff with a microfiber cloth. Finish by removing residue so it cannot bake on next time.

    Keep it safe

    Avoid steel wool, gritty powders, and sliding heavy pans. If sugar or plastic melts onto the surface, follow the appliance manual immediately; do not force a cold, hardened blob with a sharp tool.

    Quick check: Add this task to a seasonal home log, take a before-and-after photo, and stop if the condition is outside a simple maintenance fix.

    Why this small job matters

    Clean a Glass Stovetop Without Scratches is the kind of task that is easy to postpone because the first symptom rarely feels urgent. In a lived-in Cleaning routine, small changes add up: a little dust, a little moisture, or a little wear can make equipment work harder and can turn a ten-minute check into a weekend repair. The useful approach is to notice the change, write down what you see, and make one controlled adjustment at a time. That habit gives you a baseline for the next season and makes it easier to explain the situation if a specialist is needed.

    What to look for as you work

    Take a slow look before touching anything. Check for loose fasteners, unusual sounds, water marks, heat, damaged seals, or material that has changed color. Work in good light and keep the original parts, labels, and measurements nearby. If the result is not clearly better after the first safe step, stop and reassess rather than adding more force or more product. A short note about weather, age, and recent changes often reveals a pattern that is invisible in a single visit.

    A practical follow-up routine

    Finish by cleaning the work area and testing the result under normal conditions. Put the next inspection on a calendar, especially when the task depends on a season or a filter, seal, or moving part. Keep a simple home log with the date, what you changed, and a photo of the finished condition. That record turns maintenance into a calm routine instead of a reaction. When you find exposed wiring, structural damage, gas smells, persistent leaks, or anything that could injure someone, leave it alone and contact a qualified professional.

  • Replace a Refrigerator Door Gasket

    Replace a Refrigerator Door Gasket

    A cracked or flattened door gasket lets cold air escape and creates frost or condensation. Replacing it is a small job when the door and channel are in good shape.

    Step-by-step

    Warm the new gasket in clean water so it becomes flexible. Remove the old seal according to the refrigerator manual, usually by loosening retaining screws rather than tearing it out. Seat the new lip evenly, tighten screws gradually, and close the door for several minutes. Check the paper test around all four sides.

    Keep it safe

    Do not use a hair dryer close to plastic or wiring. If the cabinet is warped or the hinge is sagging, correct alignment first; a new seal cannot compensate for a door that will not sit square.

    Quick check: Add this task to a seasonal home log, take a before-and-after photo, and stop if the condition is outside a simple maintenance fix.

    Why this small job matters

    Replace a Refrigerator Door Gasket is the kind of task that is easy to postpone because the first symptom rarely feels urgent. In a lived-in Appliances routine, small changes add up: a little dust, a little moisture, or a little wear can make equipment work harder and can turn a ten-minute check into a weekend repair. The useful approach is to notice the change, write down what you see, and make one controlled adjustment at a time. That habit gives you a baseline for the next season and makes it easier to explain the situation if a specialist is needed.

    What to look for as you work

    Take a slow look before touching anything. Check for loose fasteners, unusual sounds, water marks, heat, damaged seals, or material that has changed color. Work in good light and keep the original parts, labels, and measurements nearby. If the result is not clearly better after the first safe step, stop and reassess rather than adding more force or more product. A short note about weather, age, and recent changes often reveals a pattern that is invisible in a single visit.

    A practical follow-up routine

    Finish by cleaning the work area and testing the result under normal conditions. Put the next inspection on a calendar, especially when the task depends on a season or a filter, seal, or moving part. Keep a simple home log with the date, what you changed, and a photo of the finished condition. That record turns maintenance into a calm routine instead of a reaction. When you find exposed wiring, structural damage, gas smells, persistent leaks, or anything that could injure someone, leave it alone and contact a qualified professional.

  • Test a GFCI Outlet Safely

    Test a GFCI Outlet Safely

    Ground-fault circuit interrupters protect wet-area outlets by shutting off power when they sense an imbalance. A short monthly test confirms the protection still works.

    Step-by-step

    Plug in a small lamp, press the TEST button, and confirm the lamp turns off. Press RESET and confirm power returns. Test every device in kitchens, bathrooms, garages, and outdoor areas. If RESET will not hold, unplug downstream devices and try once more; persistent failure needs an electrician.

    Keep it safe

    Do not open the receptacle or work on energized wiring. A GFCI that trips repeatedly may be warning about moisture, a damaged cord, or a circuit fault—not an inconvenience to bypass.

    Quick check: Add this task to a seasonal home log, take a before-and-after photo, and stop if the condition is outside a simple maintenance fix.

    Why this small job matters

    Test a GFCI Outlet Safely is the kind of task that is easy to postpone because the first symptom rarely feels urgent. In a lived-in Troubleshooting routine, small changes add up: a little dust, a little moisture, or a little wear can make equipment work harder and can turn a ten-minute check into a weekend repair. The useful approach is to notice the change, write down what you see, and make one controlled adjustment at a time. That habit gives you a baseline for the next season and makes it easier to explain the situation if a specialist is needed.

    What to look for as you work

    Take a slow look before touching anything. Check for loose fasteners, unusual sounds, water marks, heat, damaged seals, or material that has changed color. Work in good light and keep the original parts, labels, and measurements nearby. If the result is not clearly better after the first safe step, stop and reassess rather than adding more force or more product. A short note about weather, age, and recent changes often reveals a pattern that is invisible in a single visit.

    A practical follow-up routine

    Finish by cleaning the work area and testing the result under normal conditions. Put the next inspection on a calendar, especially when the task depends on a season or a filter, seal, or moving part. Keep a simple home log with the date, what you changed, and a photo of the finished condition. That record turns maintenance into a calm routine instead of a reaction. When you find exposed wiring, structural damage, gas smells, persistent leaks, or anything that could injure someone, leave it alone and contact a qualified professional.

  • Stop Door Drafts with Simple Weatherstripping

    Stop Door Drafts with Simple Weatherstripping

    A drafty exterior door can make a comfortable room feel cold and raise energy use. The fix starts with locating the leak rather than covering every gap at once.

    Step-by-step

    Close the door on a sheet of paper; resistance around the frame should feel consistent. Replace compressed foam or rubber along the jamb, then inspect the sweep at the bottom. Clean and dry the surface, cut strips to length, and press them firmly without stretching. Adjust hinges or the strike plate only if the door no longer latches squarely.

    Keep it safe

    Keep weep holes clear and make sure the weatherstrip does not prevent a secure latch. If moisture, daylight, or movement remains around the frame, have the threshold and surrounding trim inspected.

    Quick check: Add this task to a seasonal home log, take a before-and-after photo, and stop if the condition is outside a simple maintenance fix.

    Why this small job matters

    Stop Door Drafts with Simple Weatherstripping is the kind of task that is easy to postpone because the first symptom rarely feels urgent. In a lived-in Home Maintenance routine, small changes add up: a little dust, a little moisture, or a little wear can make equipment work harder and can turn a ten-minute check into a weekend repair. The useful approach is to notice the change, write down what you see, and make one controlled adjustment at a time. That habit gives you a baseline for the next season and makes it easier to explain the situation if a specialist is needed.

    What to look for as you work

    Take a slow look before touching anything. Check for loose fasteners, unusual sounds, water marks, heat, damaged seals, or material that has changed color. Work in good light and keep the original parts, labels, and measurements nearby. If the result is not clearly better after the first safe step, stop and reassess rather than adding more force or more product. A short note about weather, age, and recent changes often reveals a pattern that is invisible in a single visit.

    A practical follow-up routine

    Finish by cleaning the work area and testing the result under normal conditions. Put the next inspection on a calendar, especially when the task depends on a season or a filter, seal, or moving part. Keep a simple home log with the date, what you changed, and a photo of the finished condition. That record turns maintenance into a calm routine instead of a reaction. When you find exposed wiring, structural damage, gas smells, persistent leaks, or anything that could injure someone, leave it alone and contact a qualified professional.

  • Clean a Furnace Filter for Better Airflow

    Clean a Furnace Filter for Better Airflow

    A dirty filter makes a heating or cooling system work harder. A careful replacement keeps airflow steady without turning routine maintenance into a guessing game.

    Step-by-step

    Turn off the system at the thermostat, note the arrow on the old filter, and measure it before shopping. Slide the new filter in with its airflow arrow pointing toward the equipment. Check the fit around the frame; a loose filter lets dust bypass it. Restart the system and listen for normal, even airflow at the nearest registers.

    Keep it safe

    Set a calendar reminder for a monthly visual check. Homes with pets, renovation dust, or allergies may need more frequent changes, while a lightly used system may go longer. Never run a forced-air system without a properly sized filter.

    Quick check: Add this task to a seasonal home log, take a before-and-after photo, and stop if the condition is outside a simple maintenance fix.

    Why this small job matters

    Clean a Furnace Filter for Better Airflow is the kind of task that is easy to postpone because the first symptom rarely feels urgent. In a lived-in Home Systems routine, small changes add up: a little dust, a little moisture, or a little wear can make equipment work harder and can turn a ten-minute check into a weekend repair. The useful approach is to notice the change, write down what you see, and make one controlled adjustment at a time. That habit gives you a baseline for the next season and makes it easier to explain the situation if a specialist is needed.

    What to look for as you work

    Take a slow look before touching anything. Check for loose fasteners, unusual sounds, water marks, heat, damaged seals, or material that has changed color. Work in good light and keep the original parts, labels, and measurements nearby. If the result is not clearly better after the first safe step, stop and reassess rather than adding more force or more product. A short note about weather, age, and recent changes often reveals a pattern that is invisible in a single visit.

    A practical follow-up routine

    Finish by cleaning the work area and testing the result under normal conditions. Put the next inspection on a calendar, especially when the task depends on a season or a filter, seal, or moving part. Keep a simple home log with the date, what you changed, and a photo of the finished condition. That record turns maintenance into a calm routine instead of a reaction. When you find exposed wiring, structural damage, gas smells, persistent leaks, or anything that could injure someone, leave it alone and contact a qualified professional.

  • Read a Home Water Meter to Check for Leaks

    Read a Home Water Meter to Check for Leaks

    A quiet water meter can reveal a leak before it becomes a stain or a high bill. The check takes minutes and does not require opening plumbing.

    Step-by-step

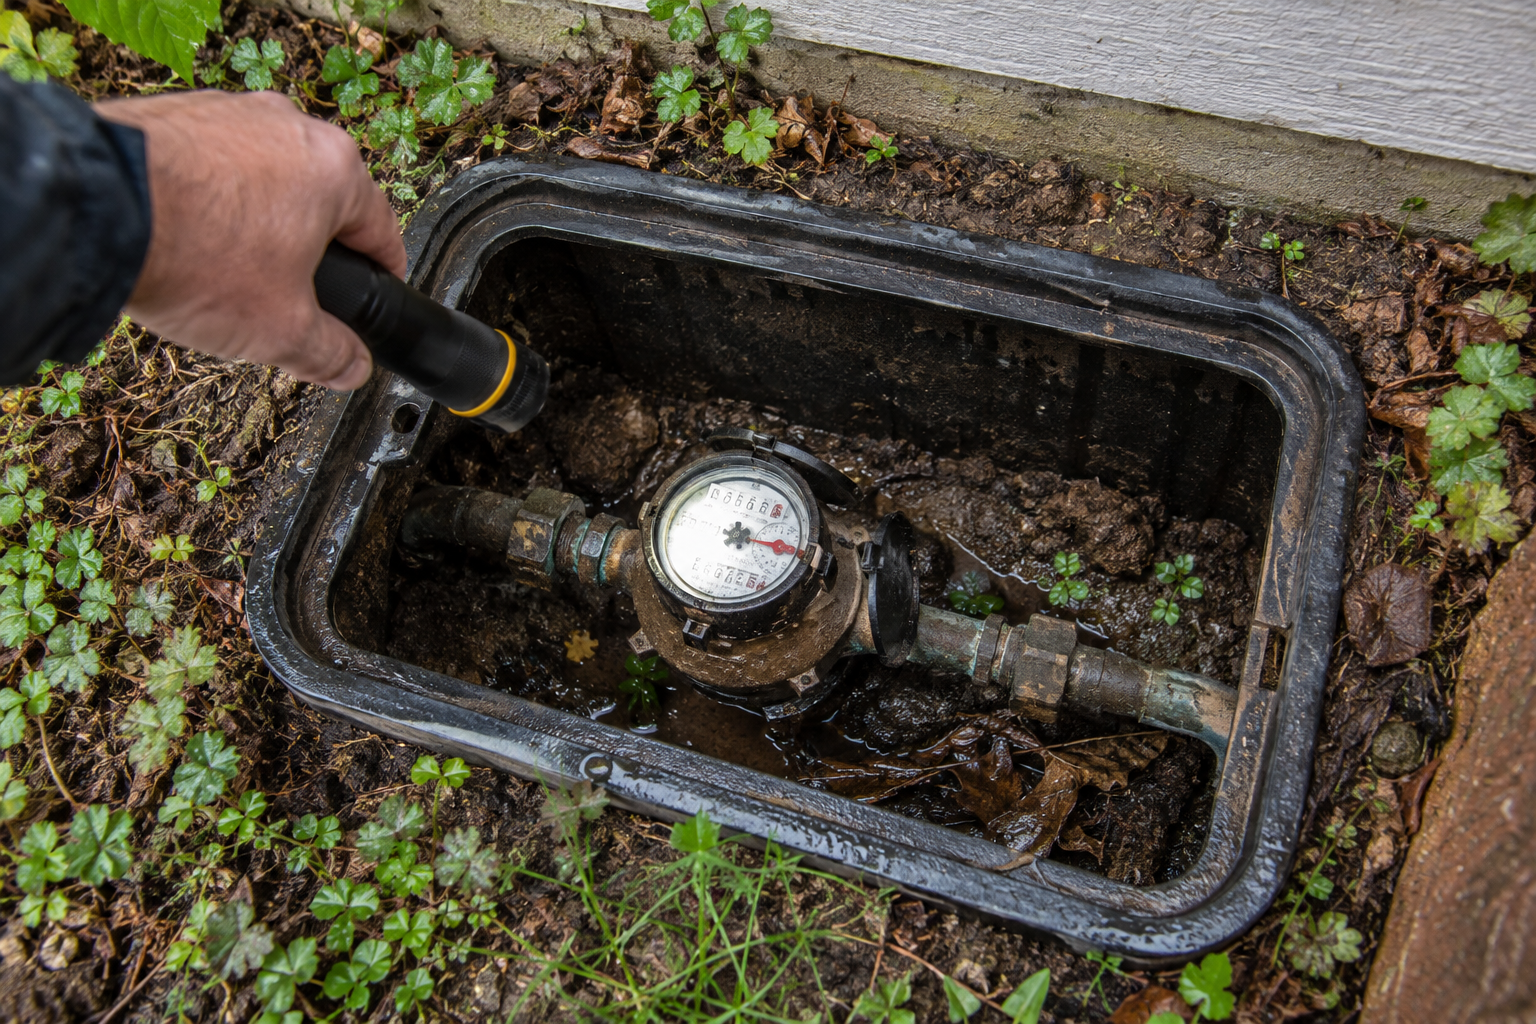
    Turn off faucets, ice makers, washing machines, and irrigation. Record the meter reading and watch the small leak indicator for ten minutes. If it moves, close one fixture valve at a time to narrow the branch. Recheck toilets with a few drops of food coloring in the tank; color in the bowl indicates a flapper leak.

    Keep it safe

    Never remove a meter lid or repair the utility side yourself. If the indicator moves with every fixture isolated, contact the utility or a licensed plumber and document the readings.

    Quick check: Add this task to a seasonal home log, take a before-and-after photo, and stop if the condition is outside a simple maintenance fix.

    Why this small job matters

    Read a Home Water Meter to Check for Leaks is the kind of task that is easy to postpone because the first symptom rarely feels urgent. In a lived-in Home Systems routine, small changes add up: a little dust, a little moisture, or a little wear can make equipment work harder and can turn a ten-minute check into a weekend repair. The useful approach is to notice the change, write down what you see, and make one controlled adjustment at a time. That habit gives you a baseline for the next season and makes it easier to explain the situation if a specialist is needed.

    What to look for as you work

    Take a slow look before touching anything. Check for loose fasteners, unusual sounds, water marks, heat, damaged seals, or material that has changed color. Work in good light and keep the original parts, labels, and measurements nearby. If the result is not clearly better after the first safe step, stop and reassess rather than adding more force or more product. A short note about weather, age, and recent changes often reveals a pattern that is invisible in a single visit.

    A practical follow-up routine

    Finish by cleaning the work area and testing the result under normal conditions. Put the next inspection on a calendar, especially when the task depends on a season or a filter, seal, or moving part. Keep a simple home log with the date, what you changed, and a photo of the finished condition. That record turns maintenance into a calm routine instead of a reaction. When you find exposed wiring, structural damage, gas smells, persistent leaks, or anything that could injure someone, leave it alone and contact a qualified professional.

  • Organize a Basic Home Tool Drawer

    Organize a Basic Home Tool Drawer

    A small, visible tool kit makes routine repairs faster and reduces the temptation to improvise with unsafe substitutes. Organization should match the jobs you actually do.

    Step-by-step

    Empty the drawer and group tools by use: measuring, fastening, gripping, cutting, and electrical testing. Keep a tape measure, screwdrivers, pliers, adjustable wrench, utility knife, level, flashlight, and gloves together. Use shallow trays so damaged tools and missing pieces are obvious. Store sharp edges covered and keep batteries separate from loose metal.

    Keep it safe

    Add specialty tools only after a real need appears. Keep electrical testers and ladders away from children, and inspect handles, cords, and blades before each use.

    Quick check: Add this task to a seasonal home log, take a before-and-after photo, and stop if the condition is outside a simple maintenance fix.

    Why this small job matters

    Organize a Basic Home Tool Drawer is the kind of task that is easy to postpone because the first symptom rarely feels urgent. In a lived-in Tools & Equipment routine, small changes add up: a little dust, a little moisture, or a little wear can make equipment work harder and can turn a ten-minute check into a weekend repair. The useful approach is to notice the change, write down what you see, and make one controlled adjustment at a time. That habit gives you a baseline for the next season and makes it easier to explain the situation if a specialist is needed.

    What to look for as you work

    Take a slow look before touching anything. Check for loose fasteners, unusual sounds, water marks, heat, damaged seals, or material that has changed color. Work in good light and keep the original parts, labels, and measurements nearby. If the result is not clearly better after the first safe step, stop and reassess rather than adding more force or more product. A short note about weather, age, and recent changes often reveals a pattern that is invisible in a single visit.

    A practical follow-up routine

    Finish by cleaning the work area and testing the result under normal conditions. Put the next inspection on a calendar, especially when the task depends on a season or a filter, seal, or moving part. Keep a simple home log with the date, what you changed, and a photo of the finished condition. That record turns maintenance into a calm routine instead of a reaction. When you find exposed wiring, structural damage, gas smells, persistent leaks, or anything that could injure someone, leave it alone and contact a qualified professional.